In this guide to converting images from a WebP file to a PNG file, we’ll give you an overview of the WebP format and how to convert WebP files to PNG files using a Mac, Windows, and Photoshop.
Skip ahead with these quick links:
- What is WebP?
- WebP vs PNG
- How to download or save a WebP file
- Viewing and opening a WebP file
- Converting WebP to PNG
What is WebP?
If you’ve never heard of WebP files before, you’re not alone. It’s an image format that has been more widely used lately on websites and mobile apps.
WebP has a few big benefits:
- 43% smaller file sizes compared to PNG format(study by KeyCDN). This helps websites load faster while using less bandwidth.
- Supports transparent backgrounds (just like a PNG file).
- Retains image quality (it’s lossless) or can be reduced (lossy).
WebP has a few big downsides:
- Older web browsers don’t currently support the format. On the plus side, those who still use older browsers will just see non-WebP versions of the images.
- WebP images are harder to edit since most editing programs don’t support the WebP image format natively (yet).
If you’re concerned because you’ve never heard of the WebP format before, there’s no need to be worried about security. The format is perfectly safe to use, and many websites already use this format.
What is PNG?
PNG (Portable Network Graphics) is a file format used for storing images, web graphics, and logos. PNG was created as an improved replacement for the GIF (graphics interchange format) file format and has since become one of the most widely-used image formats on the web.
WebP vs. PNG
The big thing that sets WebP apart from PNG is that it’s flexible. This includes the ability to:
- Make images with a transparent background or not. (same as PNG)
- Make images lossy or lossless. This means you can make an even smaller WebP image by reducing image quality a little bit. (unlike a PNG)
So what does that mean when we compare WebP to PNG files? It means that WebP gets the benefits of both JPGs and PNGs, and is versatile enough to meet most needs.
Let’s take a quick look at the traditional breakdown of image formats.
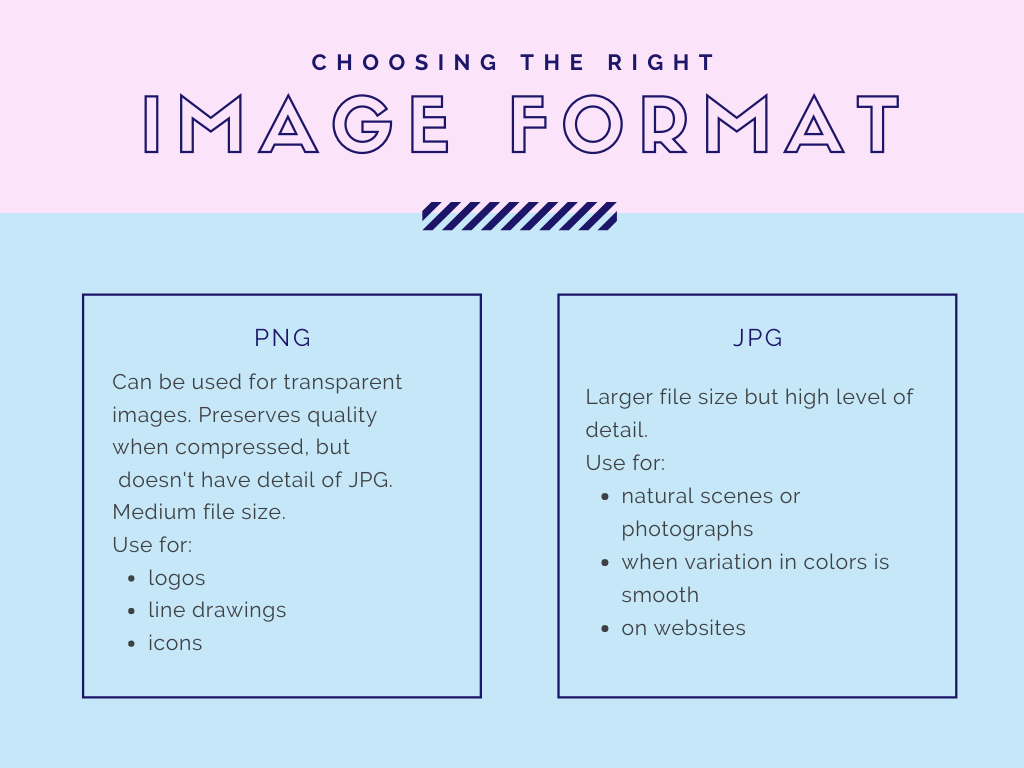
You’ll notice that PNG is usually used for less detailed images, while JPG is best for photographs and high detail. WebP combines the best of both worlds.
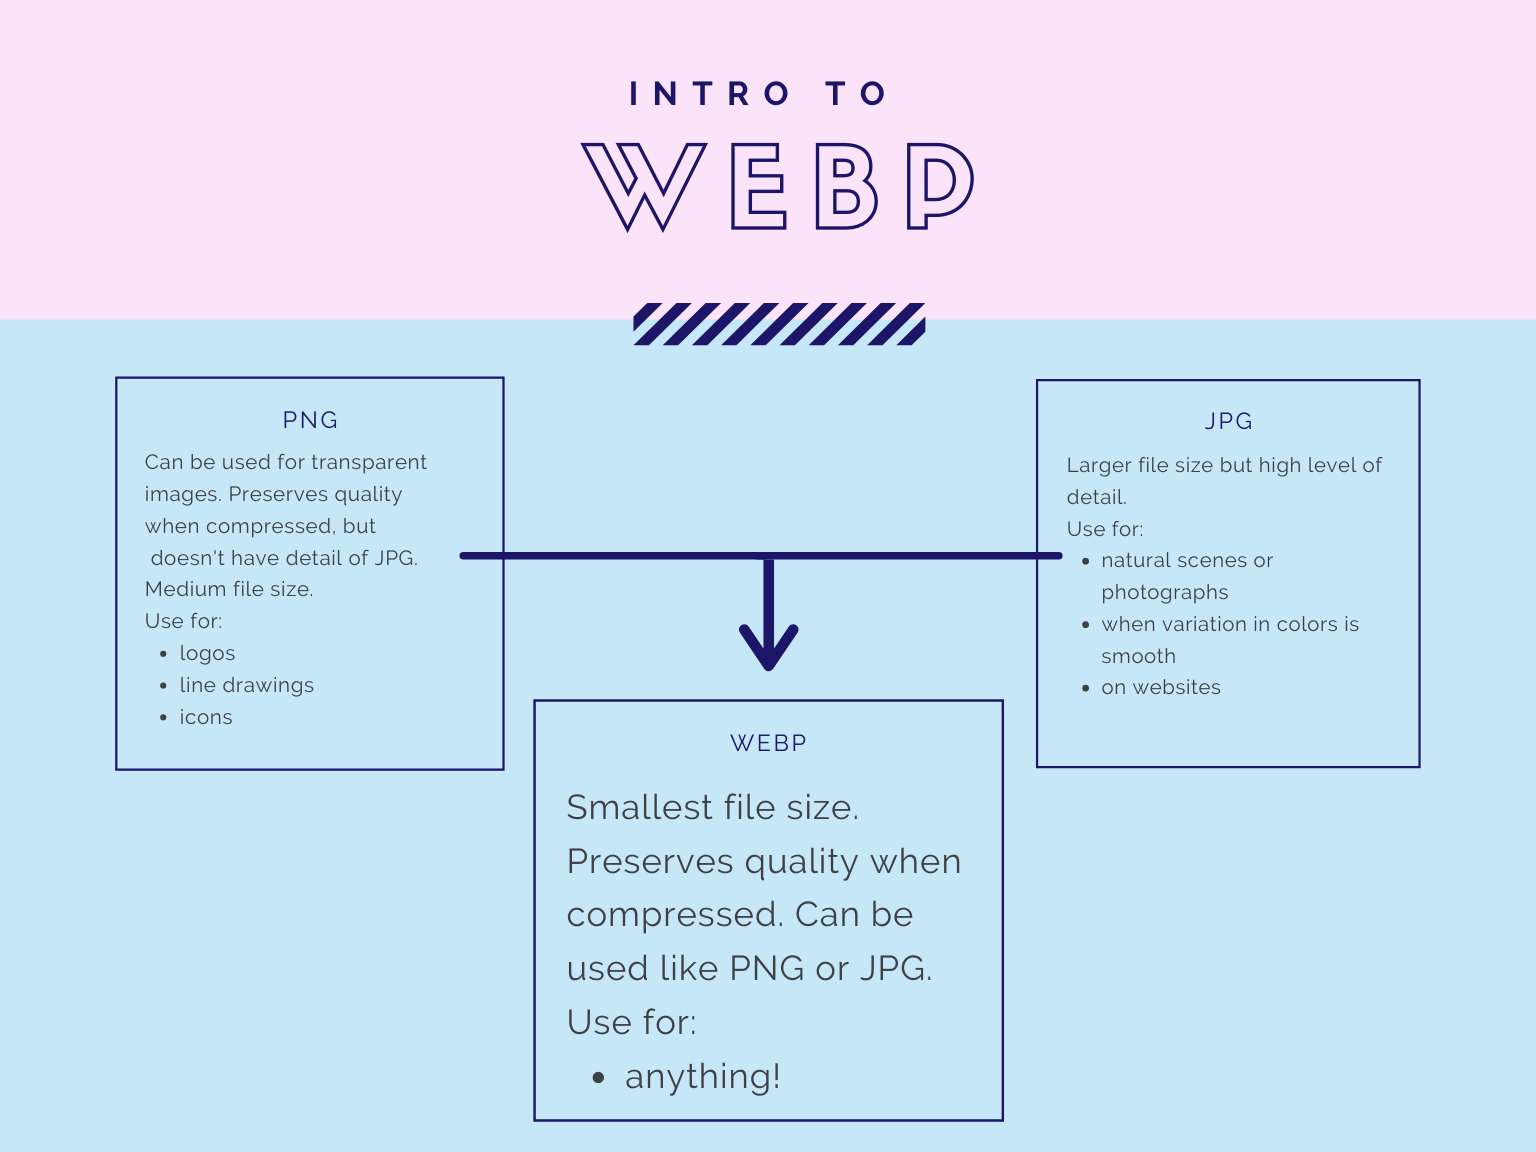
Tl;dr: The reason that WebP is so versatile is because it does have the options of transparent background vs. not transparent while also having the option of lossy vs. lossless.
If you need your image to be incredibly detailed, you can use a lossless version. If you want to save more space, you can use a lossy version. On top of all that, WebP images load faster than any other image file on websites.
How Do I Save a WebP File?
Ok, so with all of that, you’re probably interested in getting your hands on some WebP images. If you see one online and you want to save it, how do you make that happen? There are two main ways.
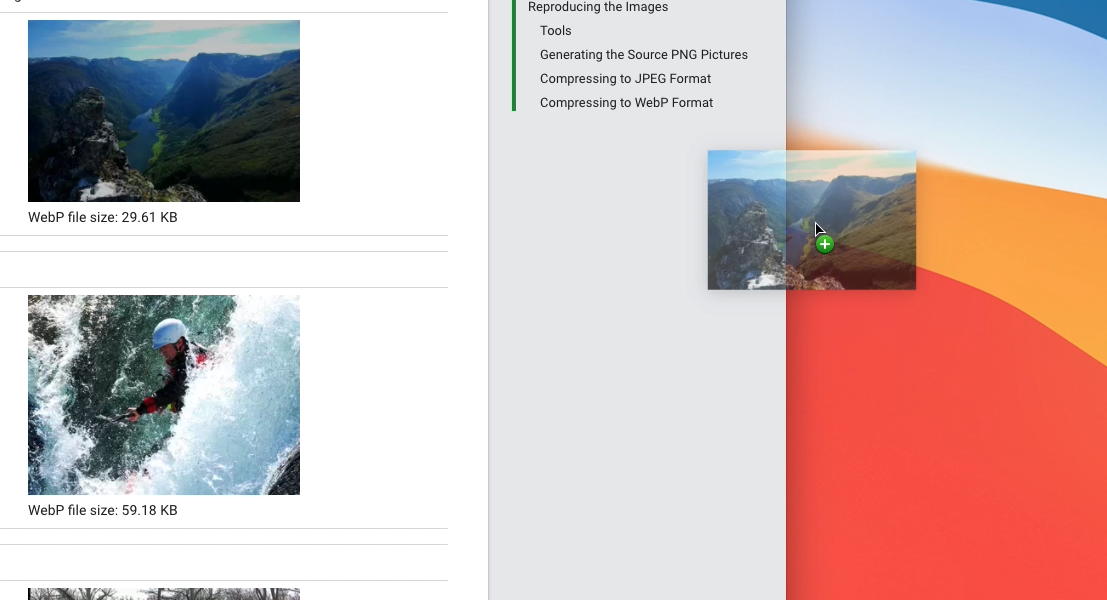
Method #1: Drag and Drop
This is pretty simple. All you have to do is drag and drop the image onto your desktop. Boom. There’s your file.
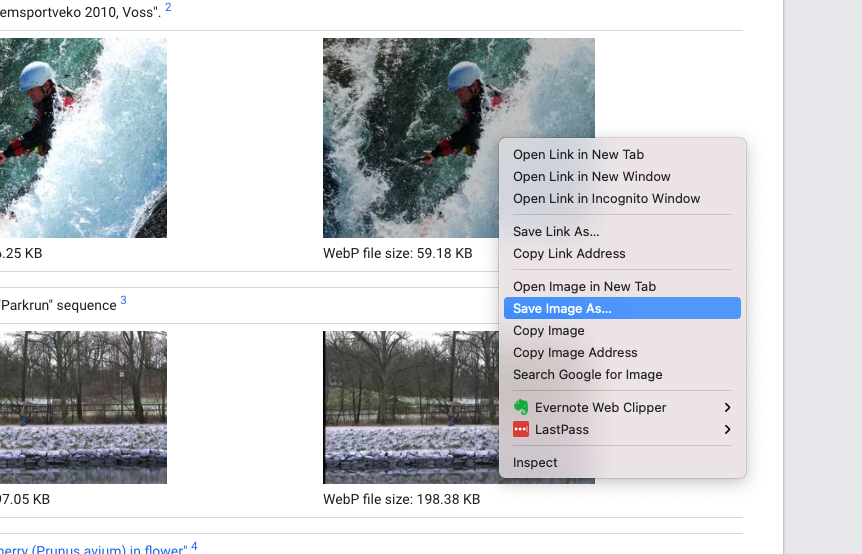
Method #2: Right-Click Save
This is only slightly more complex. Right-click on the image and click save image as. You should see WebP listed as the format. Choose where you’d like to save the image, and click save.
How Do I View a WebP File?
View WebP with a Web Browser
The easiest way to view a WebP file is online (that’s what they were made for after all). If you’re running a modern browser, all you have to do is find the file on your computer and double-click. It will open in your default browser and you can see it right there.
Supported browsers include Chrome, Firefox, Safari, Edge, and Opera.
View WebP in Finder or File Explorer
You can also see a preview of your image if you open Finder (for a Mac) or File Explorer (for a Windows PC). Make sure that your view is set to thumbnails, and you’ll be able to see previews of the images as you scroll.
From here, if you want to view the image natively on your computer, you can go ahead and open it.
View WebP in Preview (Mac) or Paint (Windows)
You’ll use a different program depending on the type of computer (Mac vs Windows) you’re using.
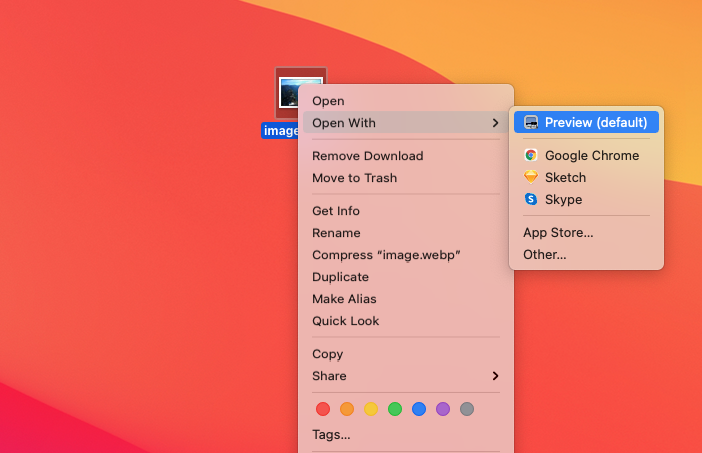
On Mac, you’ll use Preview to open your WebP file. Right click and select “open with”, then choose Preview.
One quick note here: if you’re running an older OS, Preview may not be able to open the image. You’ll need to update to BigSur.
On Windows, the easiest way to open your image is through MS Paint. You can either right click on the file and choose “open with”, or open Paint and then open the image. You’ll be able to see the WebP file without a problem.
A Breakdown of Image Compression
There are two types of image compression — lossy and lossless. Lossy compression reduces file size by discarding some data, while lossless compression retains all data but may not be as effective at reducing file size.
PNG is a lossless format, meaning that no data is lost when the file is compressed. This makes it ideal for storing images that need to be high quality, such as logos or product photos. However, because PNG files are not as efficiently compressed as lossy formats like WebP, they may be larger in file size.
How Do I Convert WebP to PNG?
We’re going to go through three different methods for converting your WebP image to a PNG file. Let’s start with Mac.
Convert WebP to PNG on a Mac
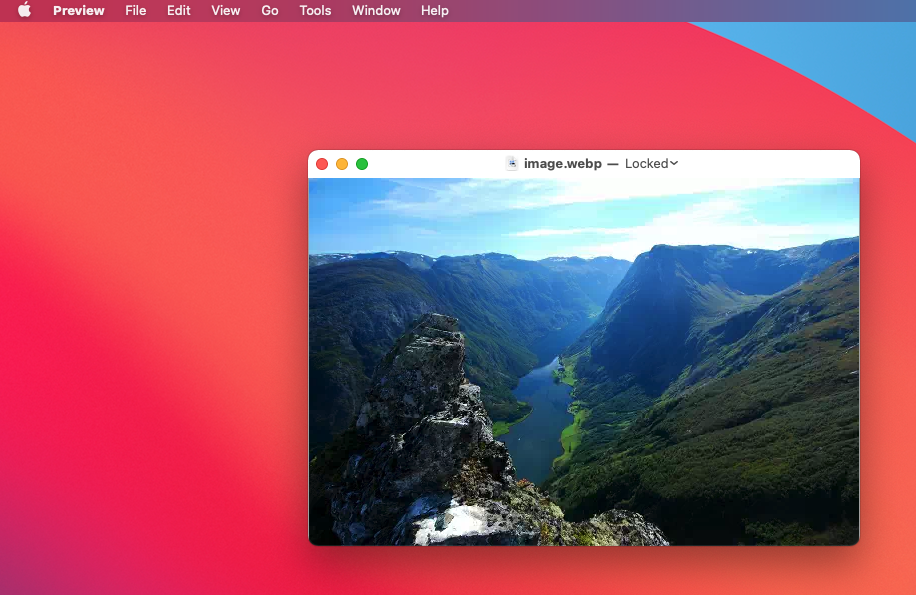
You’ll start by opening the file in Preview.
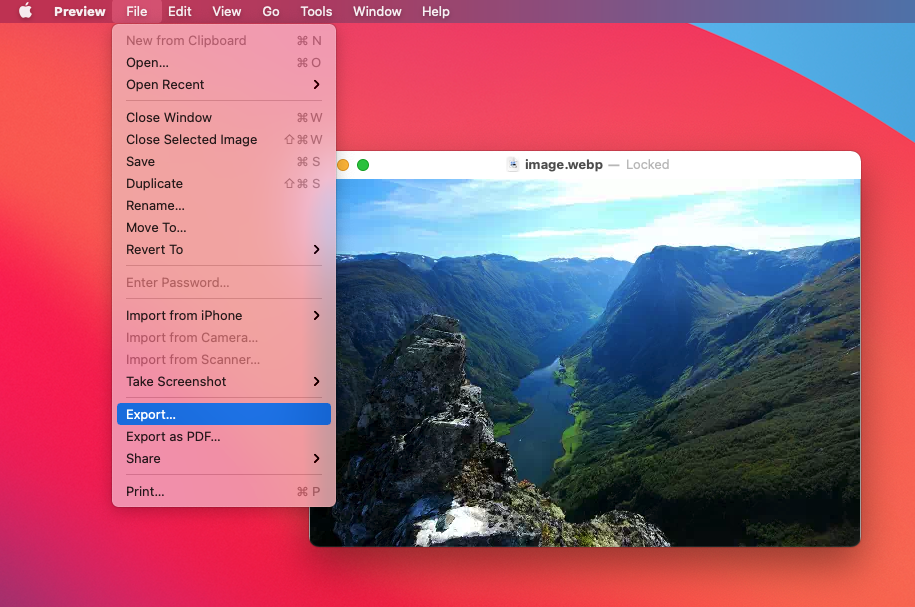
From here, you click on File, then Export.
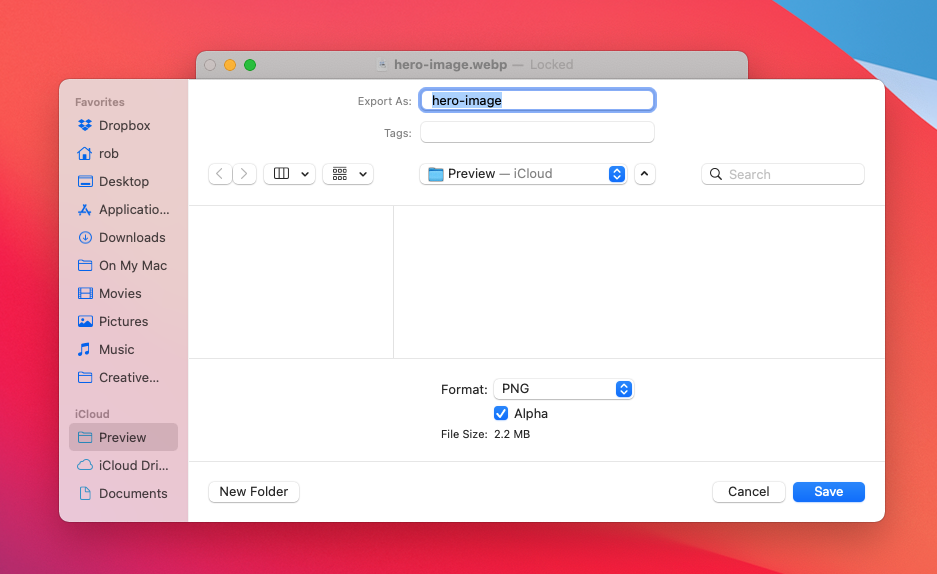
You’ll have your choice of file types, and you can pick PNG. If the WebP image has a transparent background and you want to keep it transparent, then make sure you’ve checked “Alpha”. Then save.
Convert WebP to PNG on Windows
For Windows, the process will be very similar but you’ll do it through MS Paint.
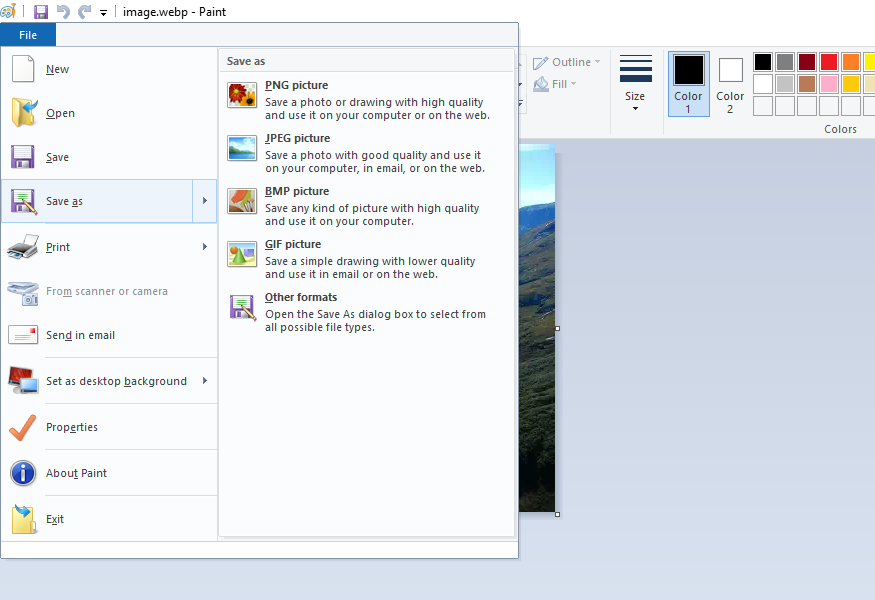
Open the WebP file in paint.

Then go to File and Save as. Under the type select PNG. Then click save.
Convert WebP to PNG using a PNG convertor
There are many WebP to PNG converters available online. We recommend using a web-based PNG converter like Zamzar or WebConvert. Simply upload your WebP file and choose the PNG option, then click “Convert”. Your file will be ready to download in seconds.
Convert WebP to PNG (Photoshop)
The final method works for either Windows or Mac. For this method, we’ll be using Photoshop. In order to open WebP files in Photoshop, you’ll need to download an extra plugin. Follow the instructions on the WebPShop page to get the plugin installed.
Once you’ve got it installed, you’ll be able to open your WebP files in Photoshop. Then you’ll follow the same steps as before:
Choose File, Export, then select the PNG format.
Now you can work with WebP files just as easily as any other image format.
Conclusion
The main difference between WebP and PNG is that WebP is a newer image format with better compression, transparency support, and the ability to create animations. For these reasons, a WebP file may be a better choice than a PNG file for web graphics.
That said, there are many ways to convert WebP files to PNG files for editing and manipulation.
We hope this post has been a helpful resource as you work hard to build your nonprofit brand. For more information on how CauseVox can help your nonprofit grow its donor base and scale effectively, click here.